Printables how-to
From PDF to finished piece
Printable wallpaper, floors, boxes and labels are some of the easiest ways to fill a room. These steps keep them the right size and looking like the real thing.
-
Print at 100%
Choose “Actual size” or 100% in the print window, and turn off “Fit to page.”
If the printable has a test square or ruler, measure it before printing the rest. If it's off, every piece will be off.
-
Match the paper to the piece
Thin paper wraps and rolls. Heavy paper holds a fold. See the paper guide below.
Set the paper type in your printer settings too, so the printer puts down the right amount of ink.
-
Let the ink dry
Give inkjet prints at least 15 minutes, longer on photo paper, before cutting or gluing.
A light coat of matte spray sealer keeps ink from smearing when glue touches it. Spray outdoors.
-
Cut on a mat with a fresh blade
Use a craft knife, a metal ruler and a self-healing mat for straight cuts; small scissors for curves.
Change the blade often. A dull blade drags and tears paper instead of cutting it.
-
Score before you fold
Run an empty ballpoint pen or a bone folder along a ruler on each fold line, then fold.
Scored folds are crisp and don't crack, which matters most on cartons and book covers.
-
Color the white edges
Cut paper shows a white edge. Run a marker or colored pencil in a matching color along it.
This one step makes boxes, books and signs look solid instead of paper-thin.
-
Glue thin and smooth
Use a glue stick or spray adhesive for flat pieces like wallpaper and floors. Use tacky glue for tabs and 3D pieces, spread thin with a toothpick.
Too much wet glue makes paper ripple. Smooth from the center out with an old card.
How it's made
From printed sheet to a shelf of groceries
A batch of 1:12 grocery packaging on the workbench. The cutting mat's grid is in inches, so you can see how small each piece is.
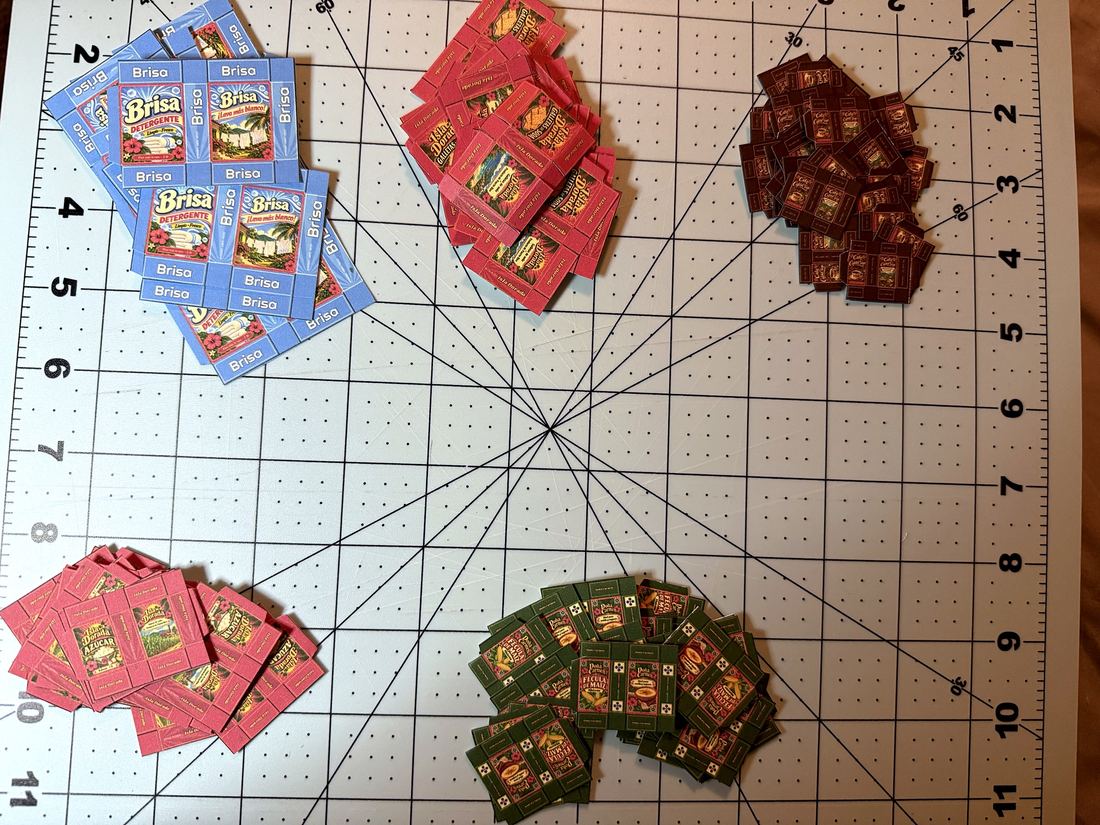
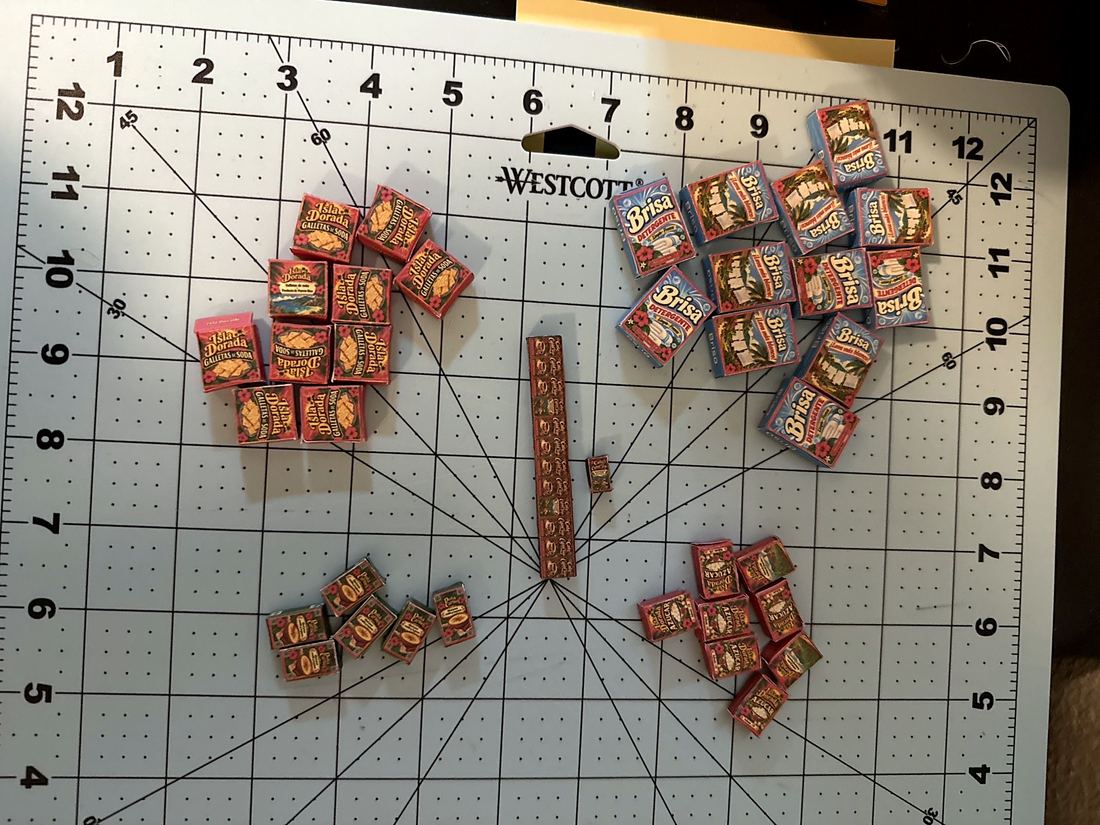
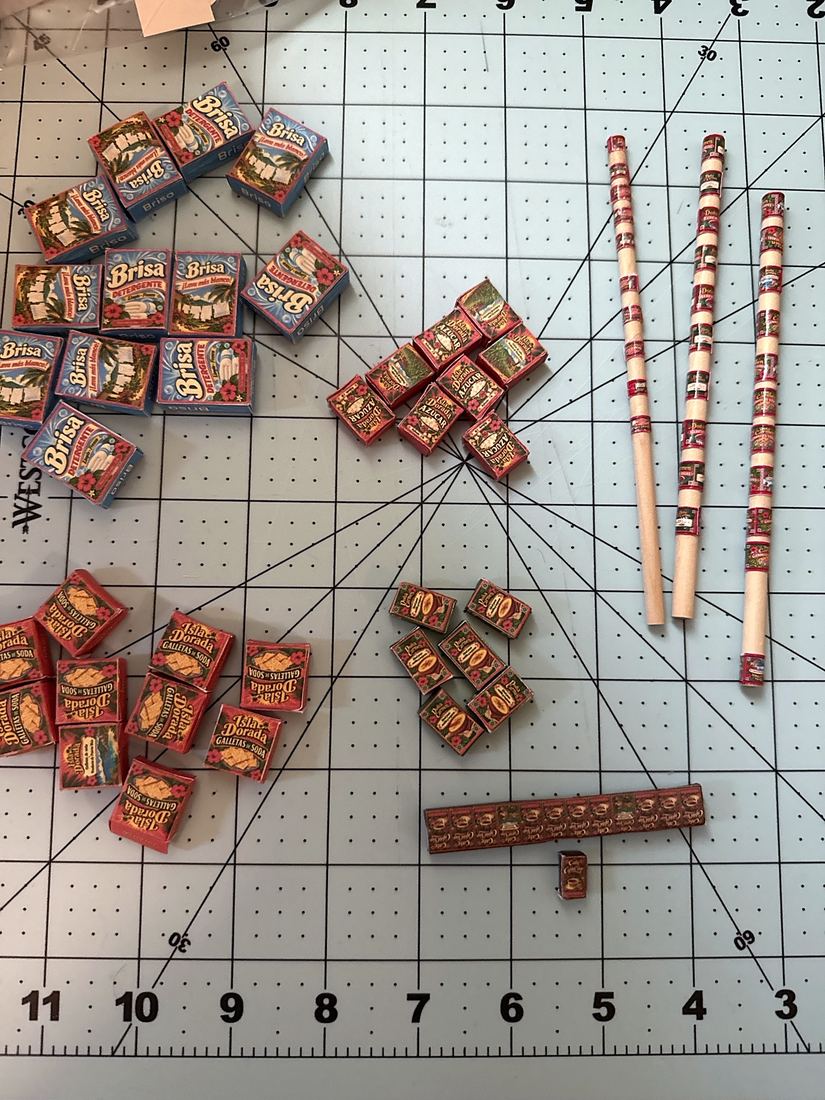
Tip: cans from a dowel
Wrap printed can labels around a wooden dowel, leaving a small gap between them, and glue each seam. Once dry, cut the dowel between the labels and you have a row of matching cans. A ¼ in dowel makes a can about 3 in across at 1:12.
| Piece | Paper | Weight |
|---|---|---|
| Wallpaper, floors | Heavy printer paper, or matte photo paper (heavier) | 24–32 lb 90–120 gsm |
| Boxes, cartons, signs | Cardstock | 65–80 lb 176–216 gsm |
| Book pages, newspapers, jar labels | Regular printer paper | 20–24 lb 75–90 gsm |
| Magazines, photos, posters | Glossy photo paper | — |
Piece doesn't fit?
- Check the print scale. Most size problems come from printing at less than 100%.
- Check the printable's scale matches your room, 1:12 or 1:24.
- Measure your box inside, not outside. Walls take up space.